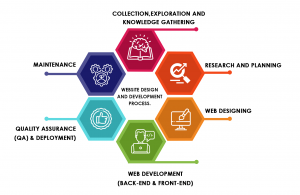
How To Make A Website
In 2020, if you want to make or create any website so you make or create it very easily with heaving any prior knowledge about how to make or create a website not even if you do not know about coding and how to code
Whether you want to make a website for yourself or for your business you can do that also you just need proper tools & resources for it.
This step-by-step guide process you can make a website without anyone help of freelancers, agencies & website builders.
All you need to spend your 1 – 3 hours according to your ability to understand and speed of internet and so on.
Things you need in order to build a website
- Domain name (your custom web address, www.YourSite.com)
- Website hosting (service that hosts your website)
- WordPress (free, commonly used website platform)
Once you have both of them domain name and hosting, then only you can start making your website and you start with wordpress, Why wordpress ? Because of many reason behind it, It is very popular, it have a lot of customization option and yes it is free for wodnload not only this but also you see that around 35% of all website available on internet are based on wordpress.
Setting up a wordpress site usually one click away from your hosting panel. Once you finished all the instruction & guide you will have a fully working website on internet next you need to be customize according to your choice.
Lets get started to make you raw wordpress website of fully working custom design website
here we go to working on it…!!!
Table of contents (Step to launch a website).
1. Choose a domain name wisely
2. Register a domain name and signup with web hosting server
3. Set up a website using WordPress (In web hosting)
4. Customize your website design and structure
5. Add important pages and content to your website
6. Setup navigation menu (Optional)
7. Add an online store (Optional)
Step #1: Choose a Domain Name wisely
In the making of develop a website the first thing you will need is a domain name. It is also called the name of your website.
Domain name is the name of your website and also address of your website too. That address is used by the visitor of your website whenever they want to visitor your website with the help either web browser or directly type your website address in web address bar.
The website domain is like wezzal.in we have and your web address can be anything which belong to your work, company or even your name as domain name.
Domain names will cost you anywhere in between $10 to $50 for a year. You can find easily somewhere $15 for a year but also if you more feature them you have to pay more for it.
- If you still have dough like how to choose a domain name then we will give you some good tips which will help you to find a good domain name.
- If you are creating a website for a business, then you must sure your domain name should match to your business name or your company name. For example YourCompanyName.com
- If you are trying setup a personal website for yourself then your domain name must be like YourName.com will be a good option.
Use a “generic” domain extension, now the question what is domain extension, well extension are like .com, .net, .org if you want some international visitors. use “local” domain name extension for the target for local country target only like .de, .fr, .ru,
Do not worry about it if your domain name and domain extension taken by someone else there are billions of possibility available to find some match with your requirement.
If you don’t have a domain name yet, there’s no need to register one.
I’ll show you how to get a domain name for free for the first year (step 2):
Step #2: Register a domain name and signup with web hosting server
After heaving domain name you will also need website hosting (web hosting).
Web hosting is a service that host and store you website file (content) safe and secure and run always 24by7 a throughout the year without server or web host and also your site will be accessible for others without web host.
Now question coming to the affordability of web hosting so it also not so expensive you can easily get one start from $3 to $10 a month, It is less then even your a time cup of coffee but it is very important for your website success.
Whichever web hosting company you choose to buy your web hosting service, make sure these are following features must have in it.
- FREE domain name with SSL (for security of your website)
- one click easy install WordPress(Free)
- Custom email account creation facility
- Unlimited or unmetered bandwidth (no traffic limitations)
- Customer support must be available 24/7 live chat option must be available
If you ever found these above feature in any web hosting service providing company then it must be a good company name also in the market.
There are so many web hosting company available in the market which have these all above facility but if you check deeply then you can also find some of them fist year free domain and some of them will give you some high discount on web hosting plan it is also depend of country to country and company to company.
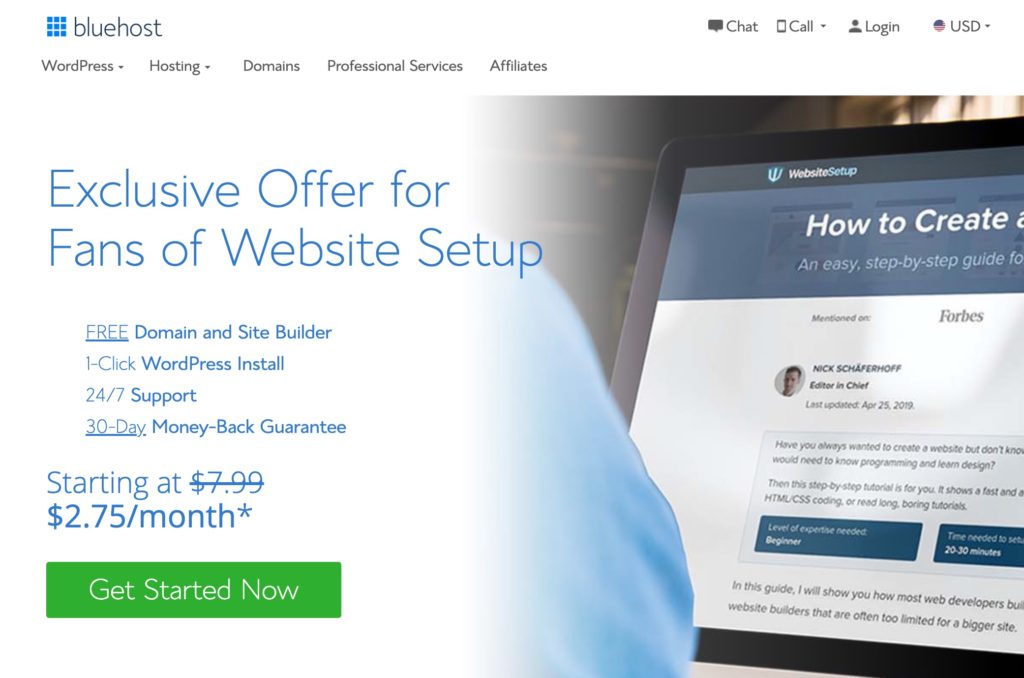
Take the example of bulehost company for domain name and web hosting for you website.
Bluehost hosting plans start from variety of plans choose one and offers all the essential features for setting up a website.
Now we will tell how you can choose one hosting plan and domain name too.
1) To get a web hosting account you just need to simply visit bluehost and click””Get Started Now”.
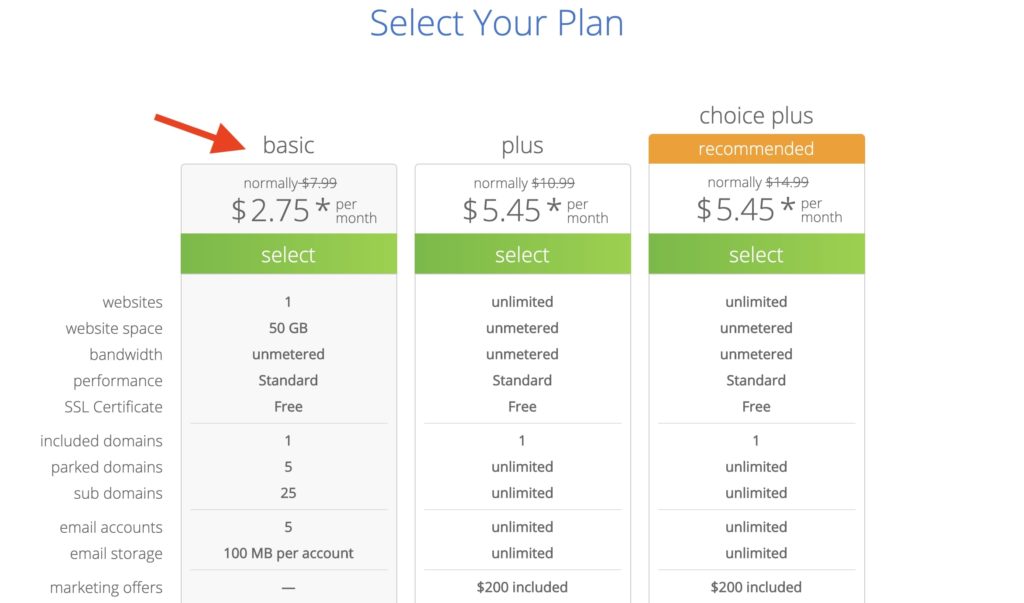
2) Next, choose your web hosting plan (choice plus is fully unlimited, while basic is best for new sites):
3) Choose and register with a domain name (See some offer first)
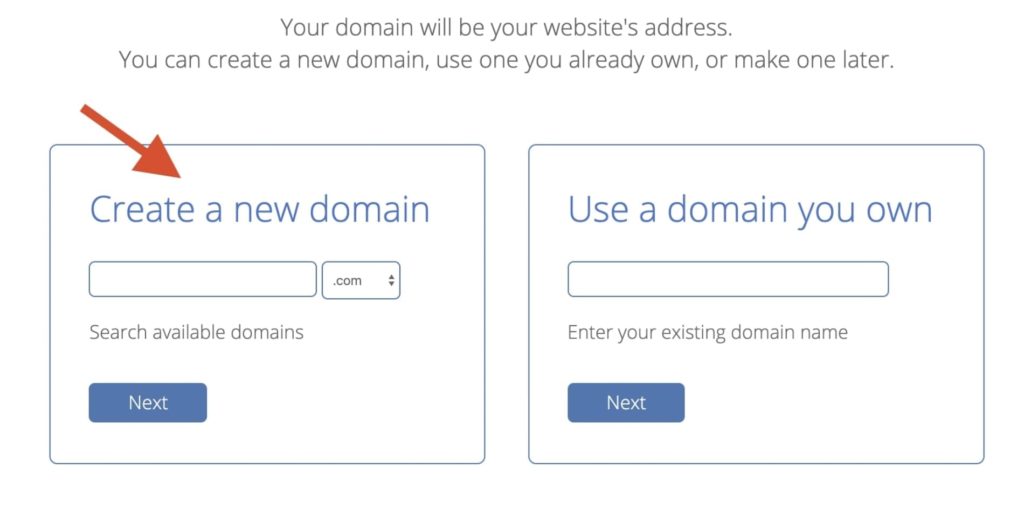
4) One you have done with all king of formalities related to your buying of domain name and web hosting service, Now you can start developing you website.
Step #3: Set up a website using WordPress (In web hosting)
Once you have all you domain name and web hosting you only need to install website making platform which is wordpress as my preference.
Why you need to install wordpress because of it have a lot of free plugin which give you dynamic range to modified your website as per requirement as you have thought ever.
Setting up WordPress website easy and your web host is relay can do it want it want so you do not worry about it.
In just in case if you want to use or your domain name and web hosting services from Bluehost the do not need to worry about it you buy it from anyone company who provide these things and you can easily install your wordpress too without any difficulties.
1) Installing WordPress Website by Bluehost
1) Log in to your domain name and hosting service called Cpanel so log in from Cpanel
2) Now you can click on “My Sites” and then “create Site”
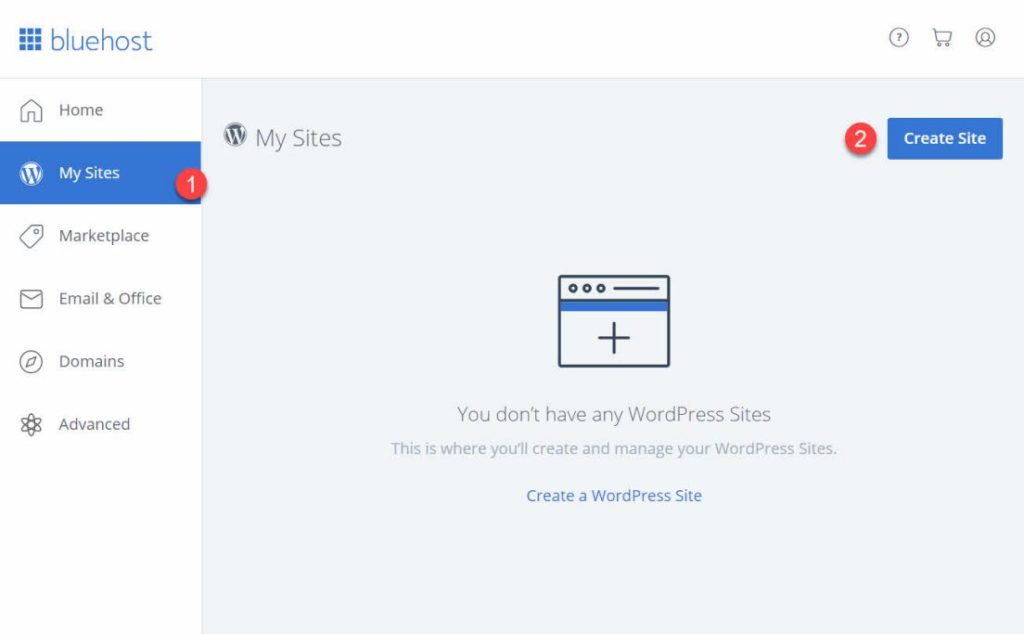
3) Provide some important and basic information about your website, and then your wordpress installation will start, this is complete a auto system process your do not need to do anything.
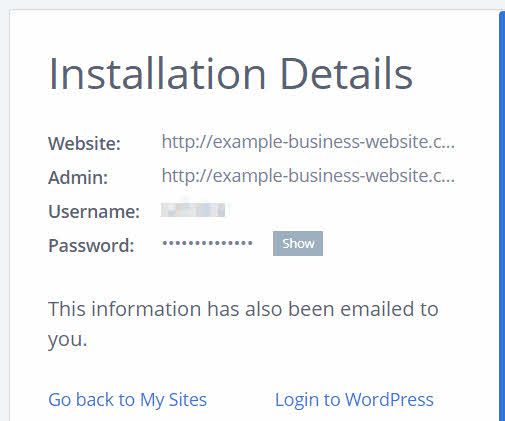
4) whenever the setup process is done bluehost will show you the details about it and give you details about your login and password for wordpress.
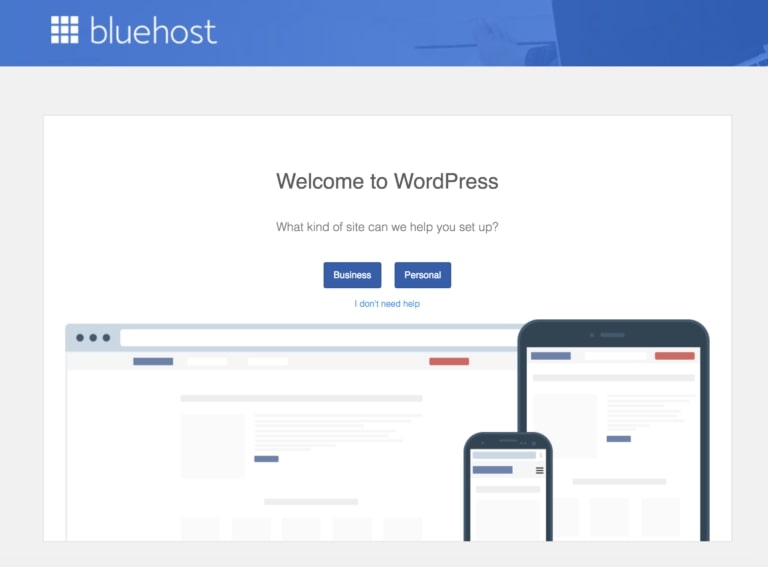
2) Test Your Website By Typing in Your Domain Address
When wordpress installed completely you must have to test your website just to know either website working fine or not.
The easiest way to do it just go through the address bar on your browser and your website address.
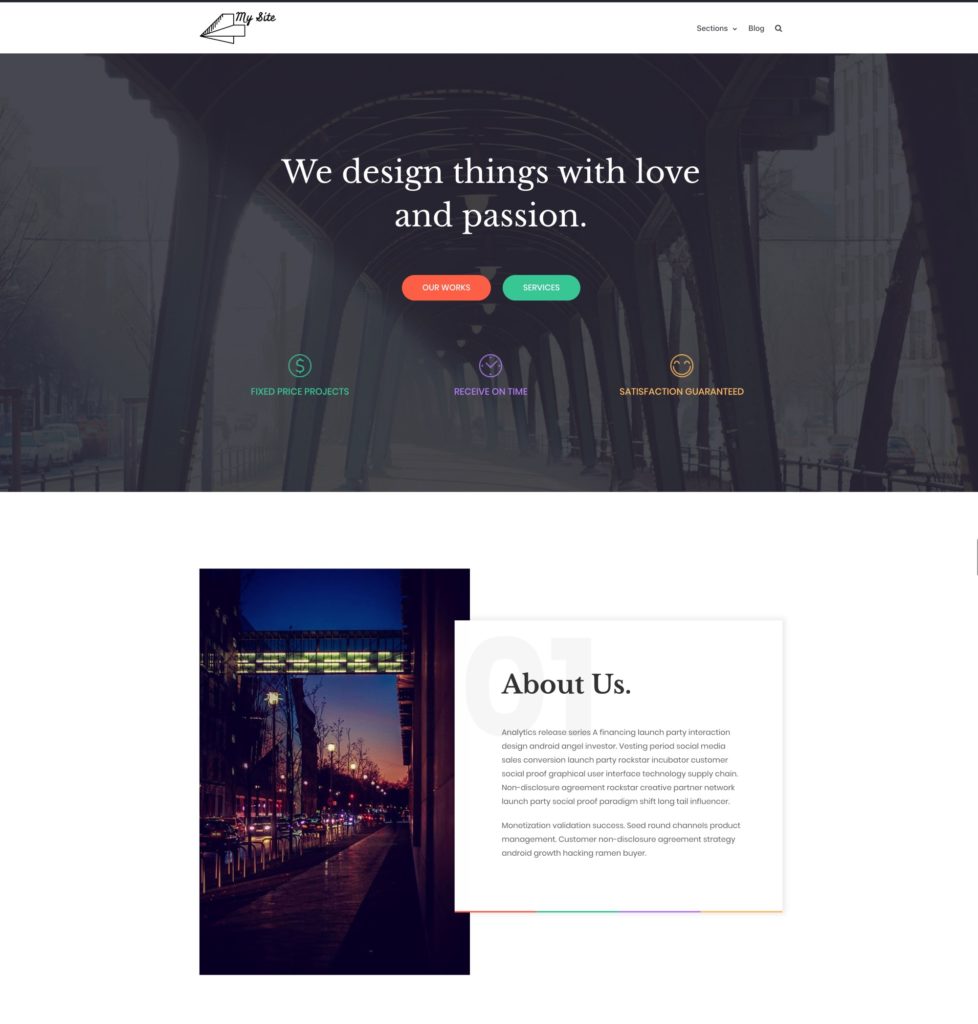
If the wordpress is isntall correctly the you can see very easily that it will open your browser without any issue like the photo below,
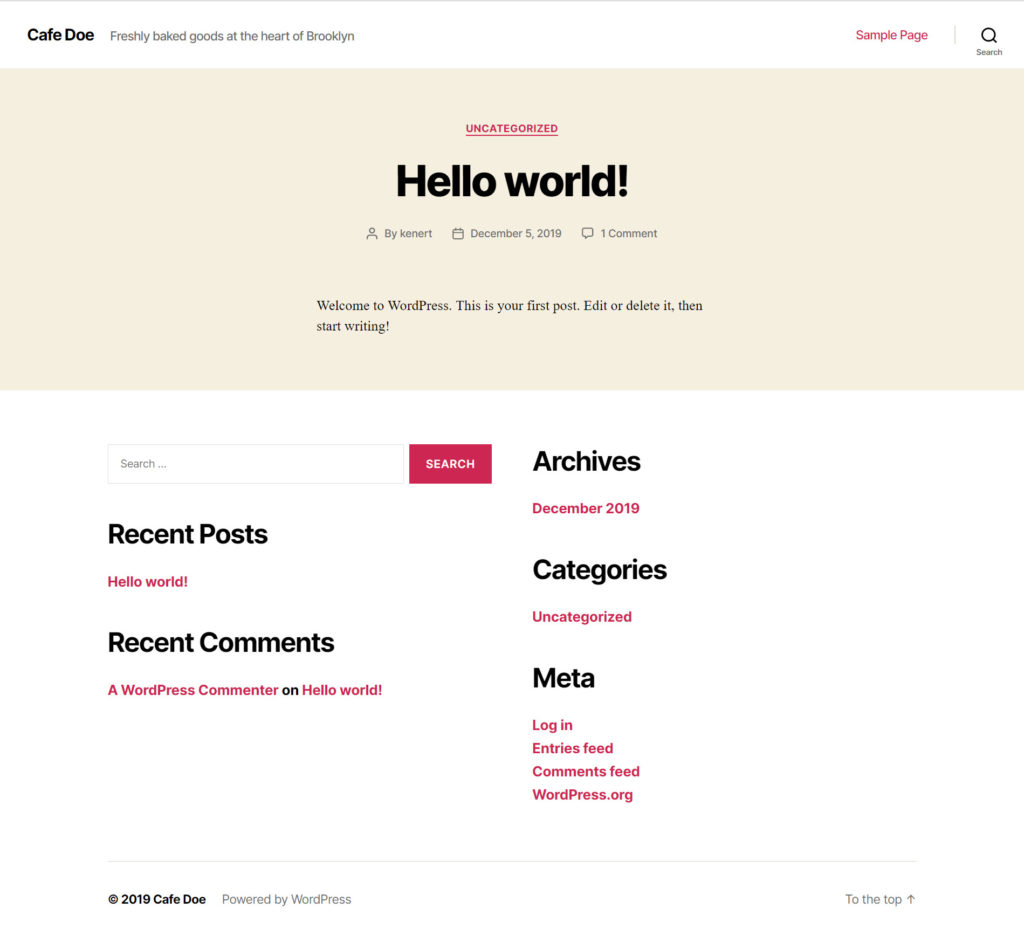
Then you realize it does not look good & attractive and then you feel to change it completely from scratch.
3) Verify your HTTPS/SSL Settings
Overall an SSL certificate make sure that your visitor have a safe and secure visit experience.
Bluehot in doing good job in this field it will add automatic SSL whenever you try to make a new website so do not need to think about it if you buy your domain name & web hosting from bluehost.
1) Log in to your Bluehost portal
2) Click on “My Sites”
3) Find your site and click on “Manage Site”
4) Go to the “Security” tab
5) Under “Security Certificate,” you will find your “Free SSL Certificate” status
If everything goes then you will see an LOCK icon just before your domain name in your web browser, actually it will take few hours to complete this process and you cannot do anything in it but your can continue to develop your website.
Step #4: Customize your website design and structure
As you know that still your website not looking good and its not attractive even, but from this point you can start customize your website and add logo, video, photos and whatever you think of you add in your website too.
1) Choose a Theme for Your Website
WordPress themes are out-of-box and you change it accordingly to your need and website design. WordPress themes are interchangeable you can change your them every easily with heaving any trouble.
Not only this but also there are thousands of free and paid wordpress theme also available on internet.
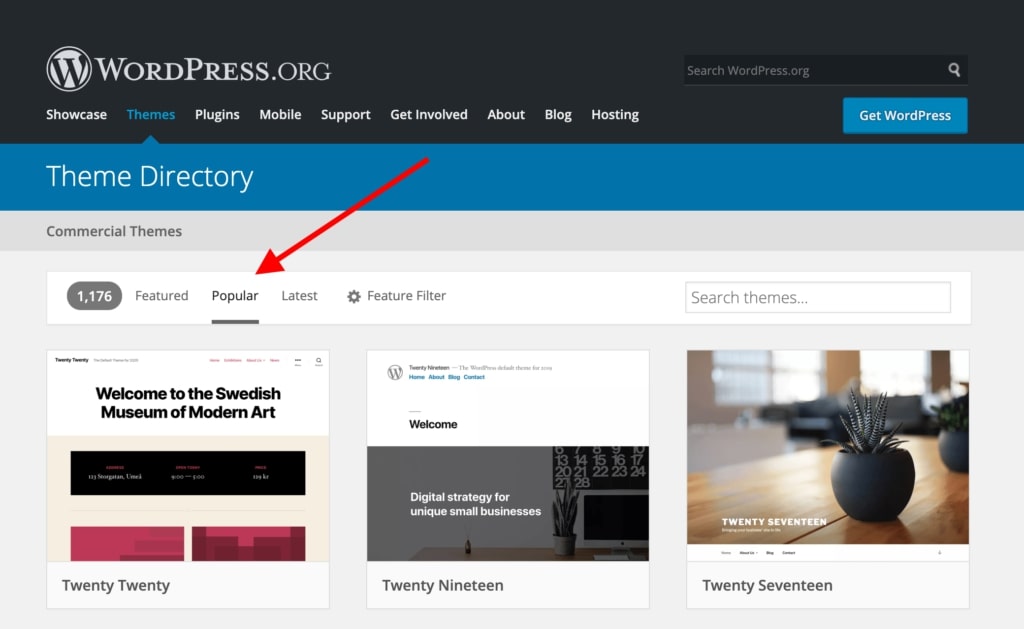
If you want to get a free theme and the most popular place to find one is wordpress.org you can configure it and attach with you current website then you can go though the popular themes.
All the themes here you will find 100% free authentic, great in quality and trusted by wordpress itself.
2) Install the Theme You Like
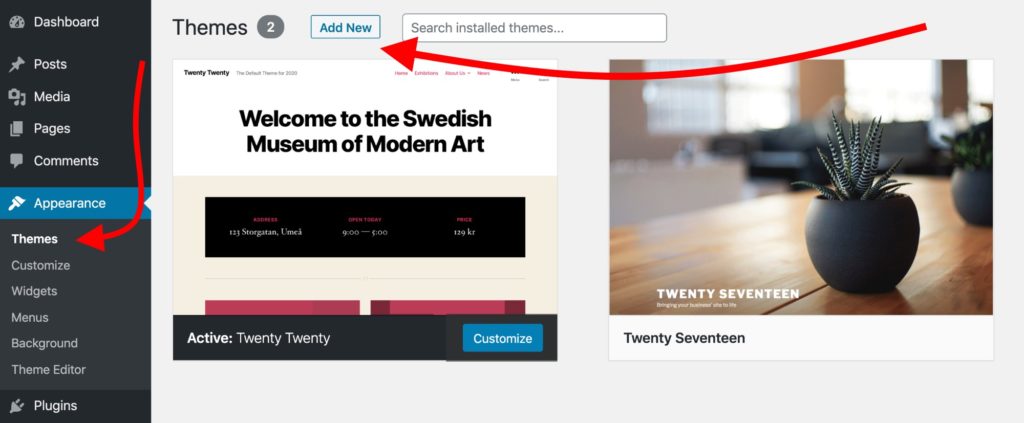
Now go to wordpress admin page and log in with this YOURSITE.com/wp-admin.
1) From the sidebar, go to “Themes ? Add New.”
2) In the search box, type in “Neve” and click on the “Install” button next to the theme’s name:
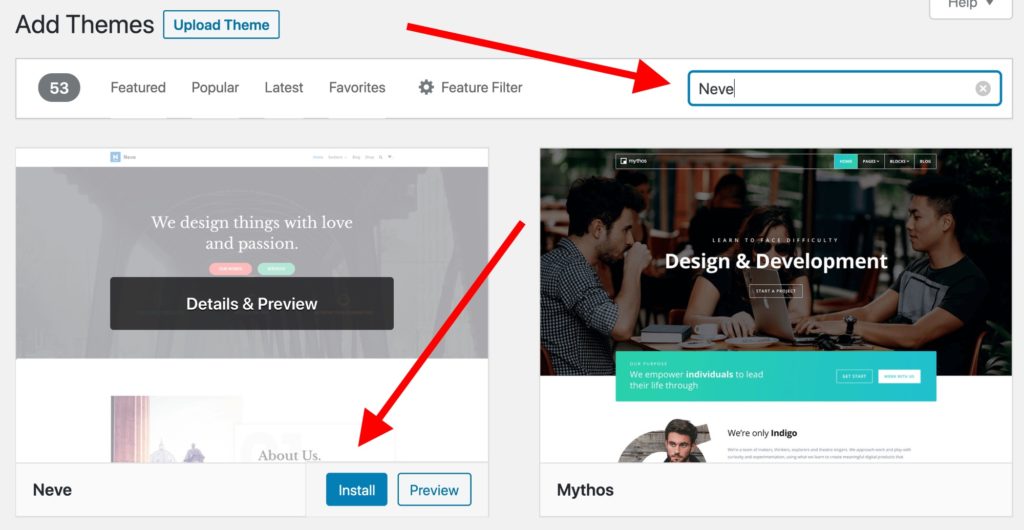
3) After the installation is done, click on the “Activate” button that will appear in place of the “Install” button.
4) You’ll see a success message, which lets you know that the installation went as expected.
3) Import a Design (Only for Neve Theme Users)
The theme is already active at this point but you need to do couple of things to look it right as you like it to look.
You’ll see this welcome message:
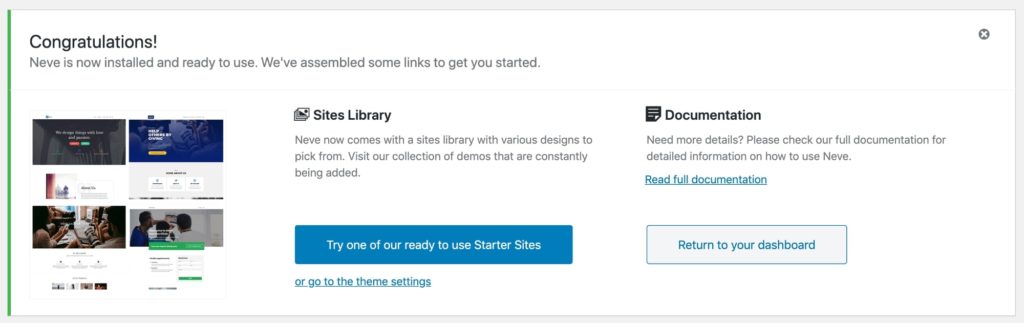
One of the great things about Neve is that you get not just one design with it, but a whole range of different designs that you can pick from. Click on the big blue
button to see them.
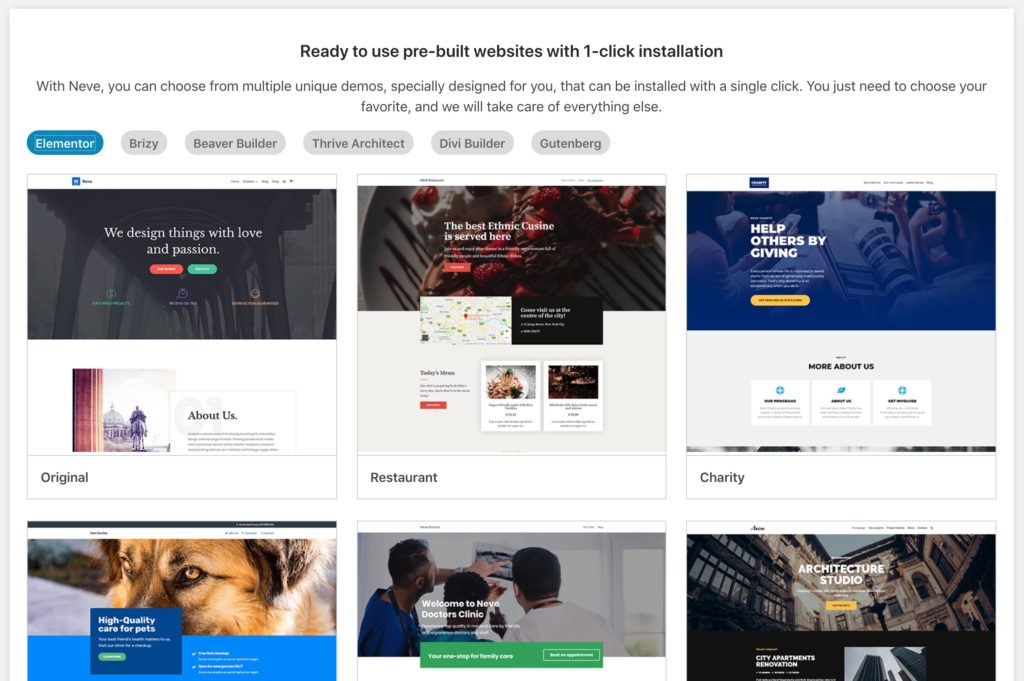
There are more than 20 designs available for free, and they cover most of the popular website niches, like business, restaurant, fitness, music, food, wedding,
photography, eCommerce, portfolio, and more. Basically, no matter what the topic of your site might be, you’ll find a design package that fits.
For the purpose of this guide, we’ll pick the first one on the list – called “Original.”
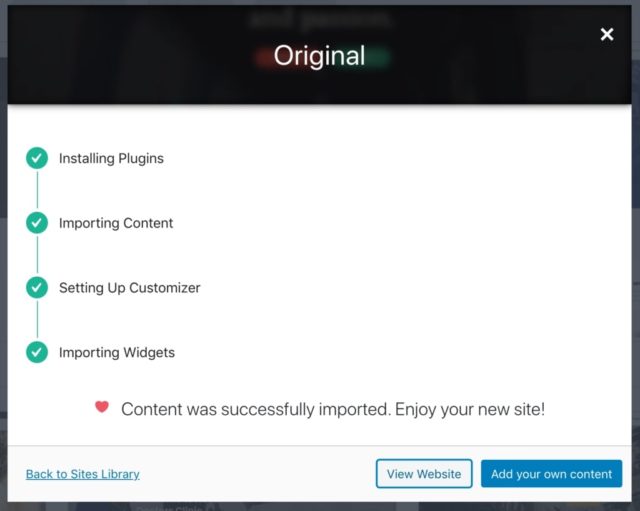
You’ll notice that this installation process takes care of all the elements you’ll need on your site – you get the design itself, all the plugins required to make it
work, and also demo content that you can later modify.
Click on the “Import” button to get everything going. After a minute or so, you’ll see the success message.
Next, go to “Appearance ? Neve Options” to see what else you can do with the theme.
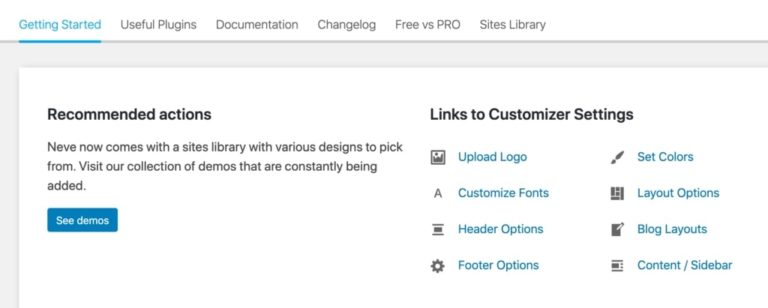
We are going to explore some of these options below:
4) Add a Logo
First of all maximum people want to show there logo on top left corner so people can see there company logo at first sight.
Once you have a logo ready, you can add it to your site. Go to “Appearance ? Neve Options” and click on the link labeled “Upload Logo.”
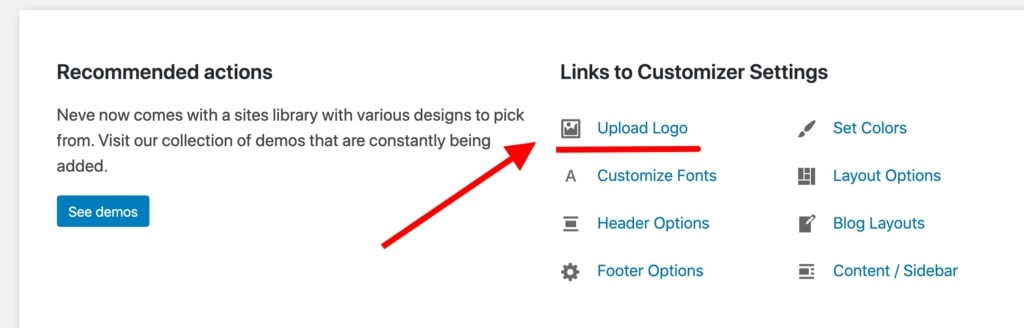
here is what you will see your logo.
This interface is called WordPress Customize, and it will help you to edit so many things which you want to edit from wordpress appearance. you can upload your logo from Upload Logo section “Select Logo” from top left corner.
WordPress will give you ab option to crop the logo but you can skip if you to it to skip it.
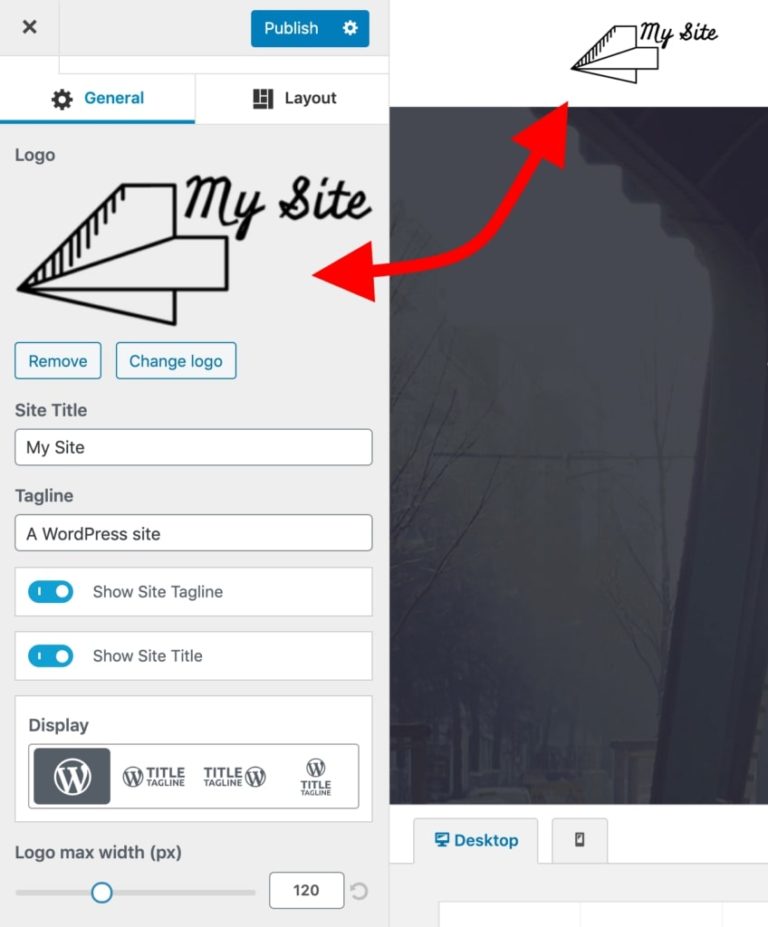
You should see your logo in the corner of the page shortly.
Additionally, you can choose if you want to display the site name and tagline alongside the logo, and set the max-width of the logo. Experiment with these settings and pick what works best for you.
Click on the “Publish” button when done (the top left corner), and then click on the “X” button to exit the Customize.
After uploading you will your logo in left corner top very soon.
one more option is there you choose if you want to display the site name as your logo on your website as the same place. You can also adjust your logo by adjusting length and width.
Click on the Publish” button with (top right corner) and then click on the “X” button to exit.
5) Change the Website Color Scheme and Fonts
You can also color theme of your wordpress theme and its fonts which you had install already. As you are learning how to make website, this is an easy issue to make your website unique in the internet to make more visitor on your website.
1) To begin, go to “Appearance ? Neve Options” again. We’re going to focus on the following two options:
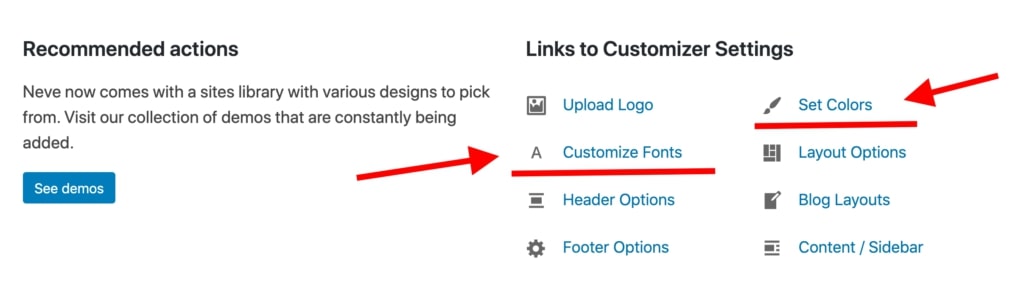
2) First, click on “Set Colors.”
3) Most WordPress themes are defined by the color scheme they use for various elements of the design.
4) Most commonly, those are colors of the links, texts on the site, and backgrounds.
5)You can change the color assignments for the Neve theme via the Customize.
6) To switch any of the colors, just click on it and pick a new color
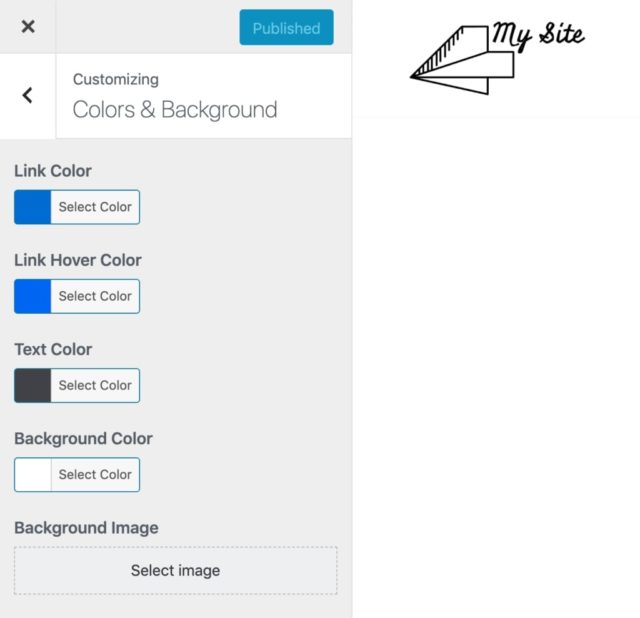
7) Click on “Publish” and “X” when you’re done.
Changing fonts works similarly:
1) Click on the “Customize Fonts” link in the “Appearance ? Neve Options” panel.
2) Neve lets you pick from a whole catalog of system fonts and Google Fonts.
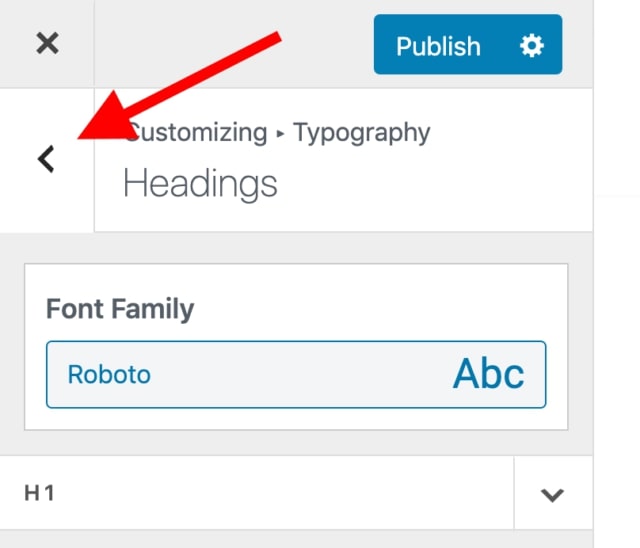
3) Just click on the “Font Family” box and select the font you like.
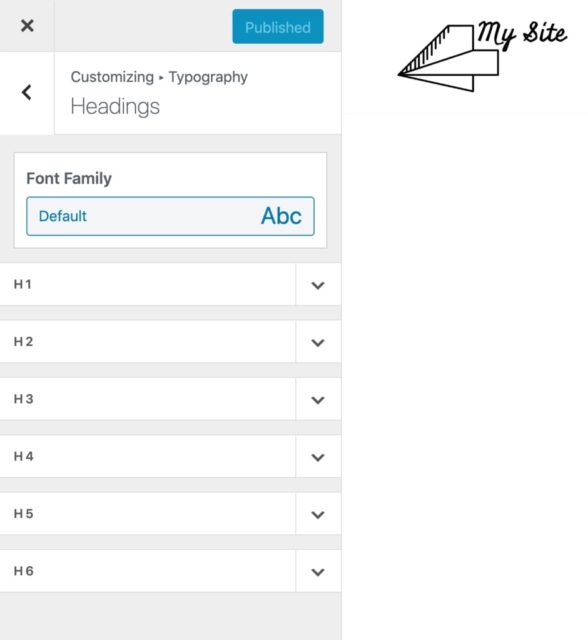
4) After that, you can fine-tune the individual fonts used for your headings.
Experiment with these settings to see the effect they have on your site.
1) To customize the font used for the body section of You have your site, click on the arrow button near the top left.go back customize
2) Click on “General.” This will take you to a similar options panel, but this time you’re adjusting the main body font.
3) Click on “Publish” and “X” when done.
6) Add a Sidebar
Another thing you can do in the “Appearance ? Neve Options” panel is set how you’d like your sidebar to look. Click on “Content / Sidebar” to begin.
Well you have three main option “No Sidebar”, “sidebar to the left”, or “sidebar to the right.” sidebar in the right side is most common and most classical used
design method. you can also adjust content width and also you can abject which content comes up and down. after doing all these setting you save it and click “X” to
exit from it.
7) Add Widgets (Free WordPress Add-On’s)
Widgets are the small content clocks which you can place it according to you website design or manage it in sidebar it fully customize.
To configure widgets, go to “Appearance ? Widgets.” You’ll see this:
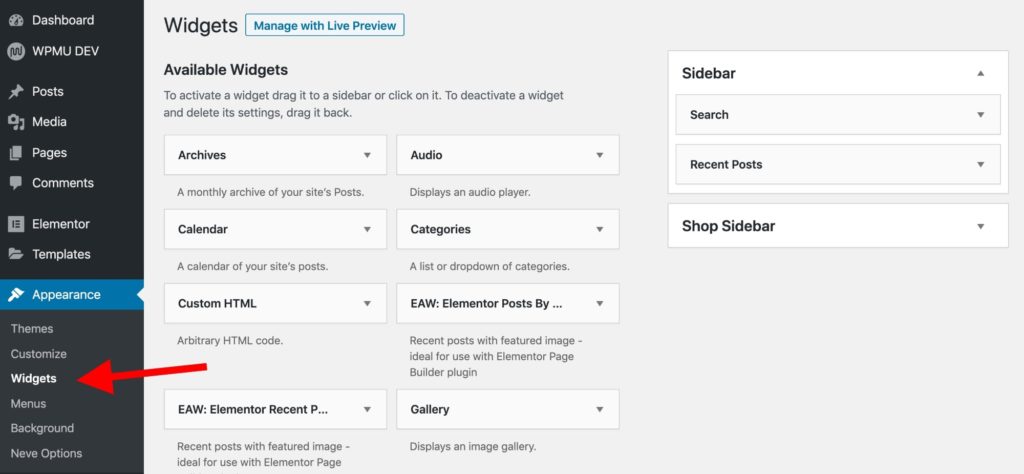
On the left side you can clearly see widgets are available and on the right side there are widgets area to add you needed widgets you just need to pick any widgets by click through mouse left button and drop it to the widgets are where you want to place it its completely drag & drop system.
8) Experiment With the Theme You Built
We have discussed almost all the main design feature but there are many option available you can use it according to your requirement.
To see them all, go to “Appearance ? Customize.” This will fire up the main interface of the Customize with all its settings and presets.
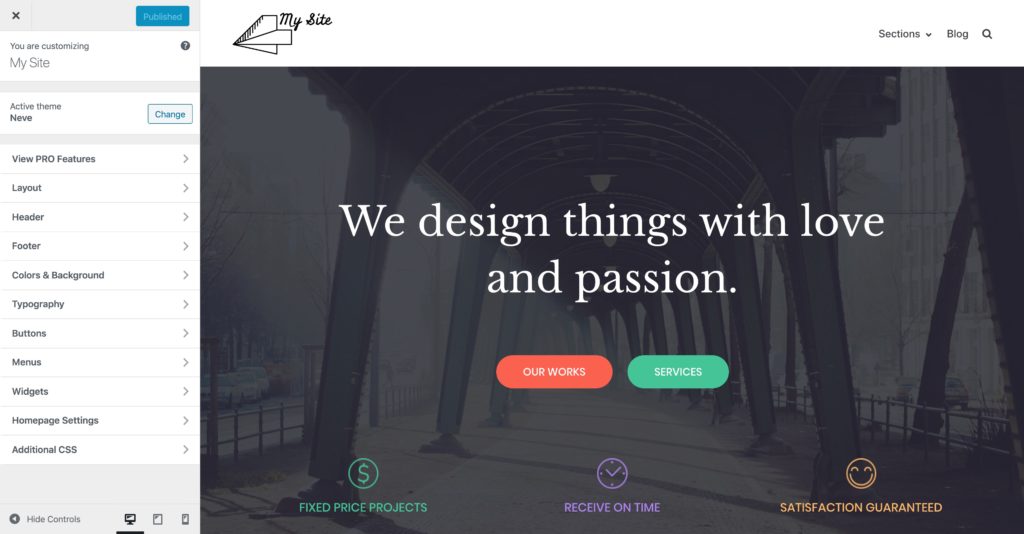
We recommend to search those available feature and play & do some more experiment by yourself with the help of google and youtube where you can easily found what are uses of remaining available feature. It will help you to gain more knowledge about how to make a website.
Step #5. Add important pages and content to your website
Pages are important part of any website with it you will not be able to give information about your business/yourself or whatever you want to share with the available
audience on internet users.
Look at the technical point of view pages are just like individual pages of a particular full file just like we have available in our offices. It behave like
document of any complete file.
Anyone Website pages are easy to create but its bit hard to make it perfect for your users so you have to little technical person to work better and quick as compare
to non technical person available in the market.
Most websites will find the following pages essential:
- Homepage – it’s the first page that your visitors see when they go to your website.
- About page – a page explaining what your website is about.
- Contact page – a page letting visitors contact you.
- Blog page – a listing of your most recent blog posts; if you’re not planning on blogging, you can use the blog page s a place for your company news and announcements.
- Services page – if the website you’re building is for a business, use this page to showcase your services.
- Shop page – for companies that want to launch an eCommece store.
Many of pages are same with one another but there only few pages which have to different from another because it nature like you home or landing page & contact us page.
1) Creating a Homepage
You can edit the structure of this page as well as the elements on it (all texts and images).
To do that, just click on the “Edit with Elementor” button in the top bar.

What you’ll see is the interface of the Elementor page builder.
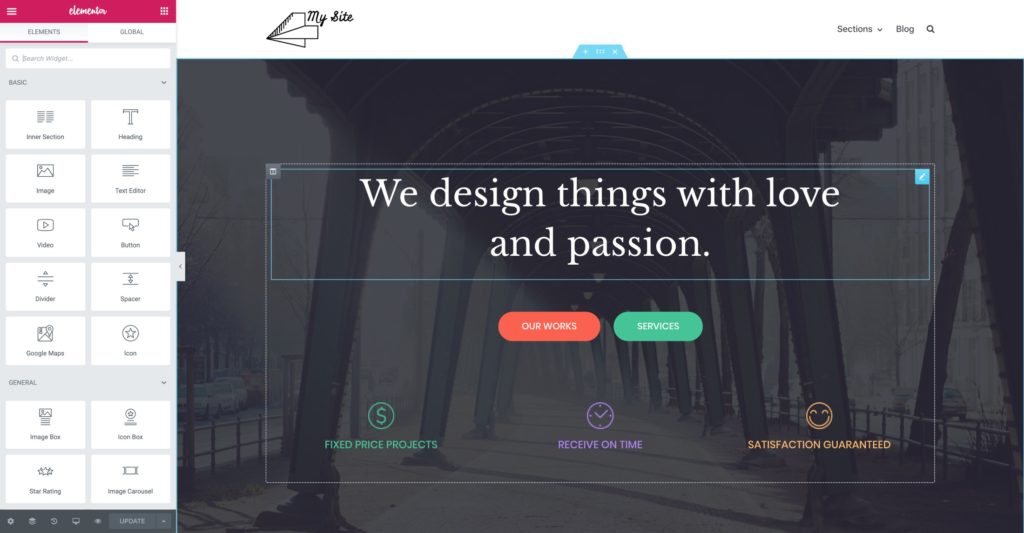
Now question is what is elementor ? elementor is one of best page builder plugin for wordpress with elementor you can make website pages with any trouble its is just as oick and drop job only and not only this but also you see your progress side-by-side live so overall it is very important plugin for wordpress development people.
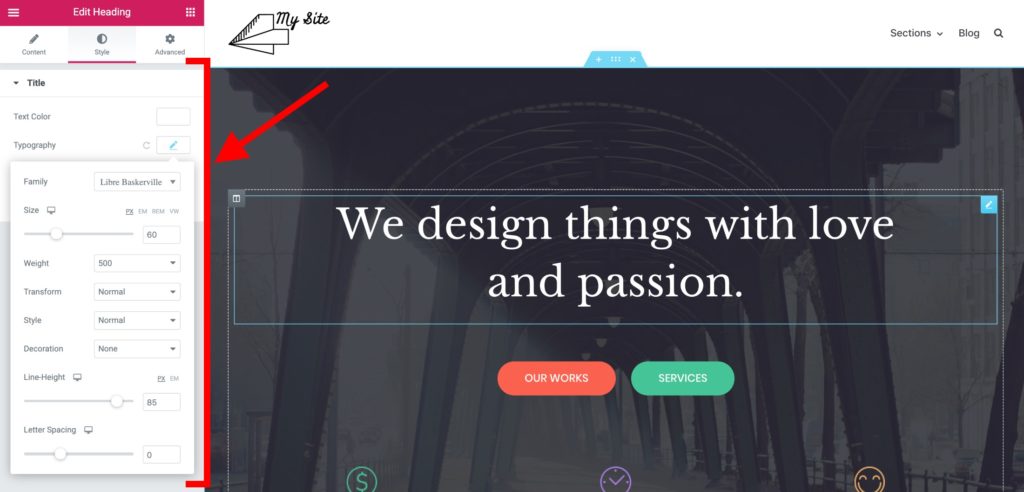
For example, if you want to change the main headline, just click on it and start typing.

Whenever you will start using elementor you will se left sidebar it is called customization panel you can adjest all king structure you want as per you website need.
For example, here’s what you can see when working on the headline:
Another great feature is that you can grab anything on the page and drag and drop it somewhere else you want.
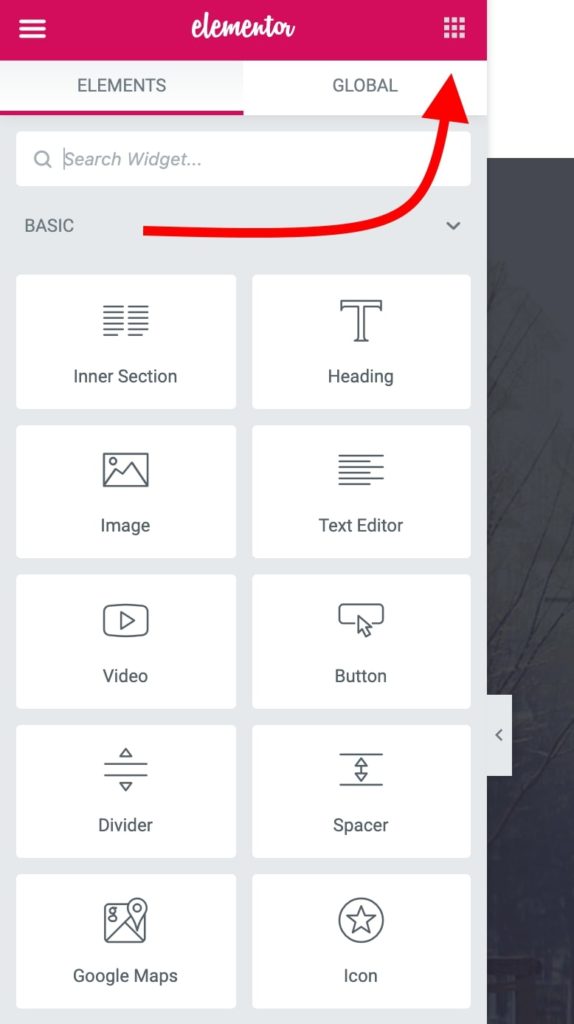
To add new elements, click on the small square icon in the top left corner.
You’ll see a list of all the content blocks available.
Grab any of the blocks and drag it onto the page’s canvas.
The best way to work on your homepage is to go block by block and edit the demo content that’s on the page.
Type in new text content, realign some of the blocks, delete the ones you don’t need, and add new ones accordingly.
This whole interface is quite intuitive to use, so just spend an hour or so using it and experimenting with different things.
2) Create Pages Such as “About”, “Services”, “Contact”
Creating web pages by classic editor is even more easy then it on your homepage. Go into “Pages ? Add New.” You’ll see this interface:
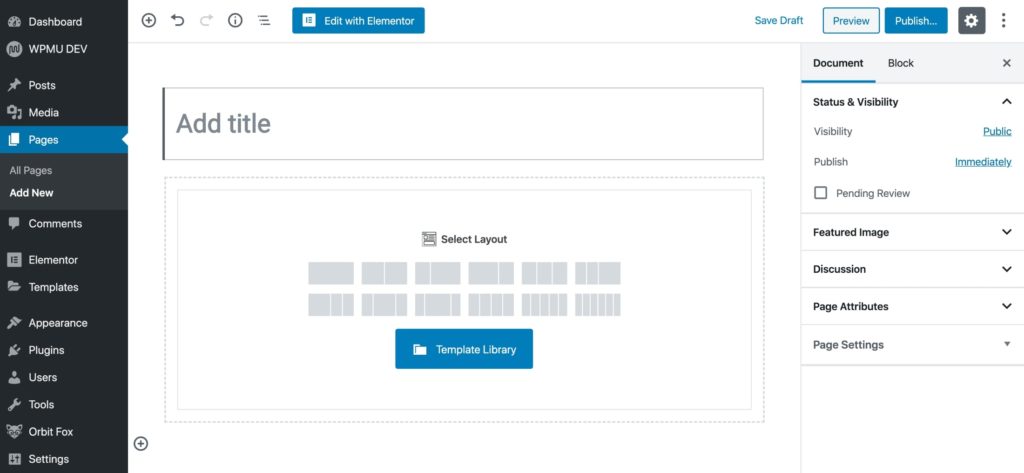
Every page need a “title”so you can make it easily by add some test in place of “Add a title” for example “About Us” or ‘Contact.”
Next one is to make page layout If you’re creating a standard page, you can go with the first one on the list – “Single Row.” But to speed things up, you can choose from the template library. For that, click on the blue button.
You’ll see a window letting you pick from a range of pre-made page sections. If you’re working on your about page, for example, you can quickly find and use the following blocks:
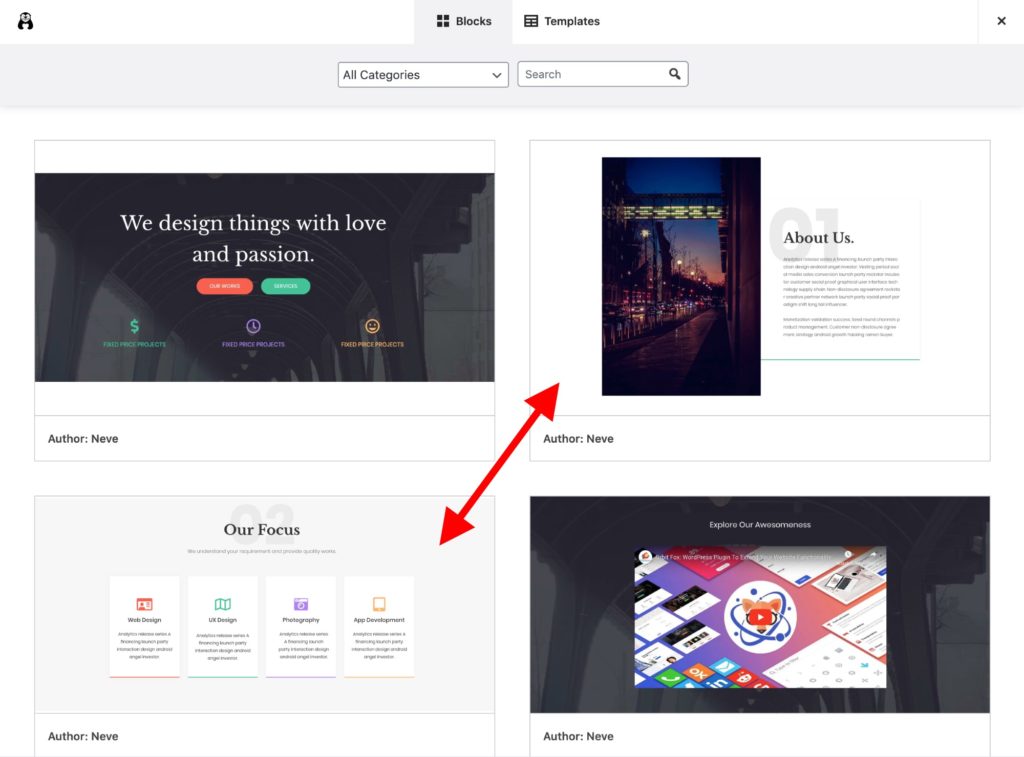
just insert it on the “Insert” button on next to the block you and then you can add this thing to the page, you can modify it later as pr needed.
When you’re done, click on the “Publish” button in the top right corner of the screen.
You can follow the same process when working on your contact page or services page as well.
Just pick different page blocks from the template library. For example, these should work great on a services page:
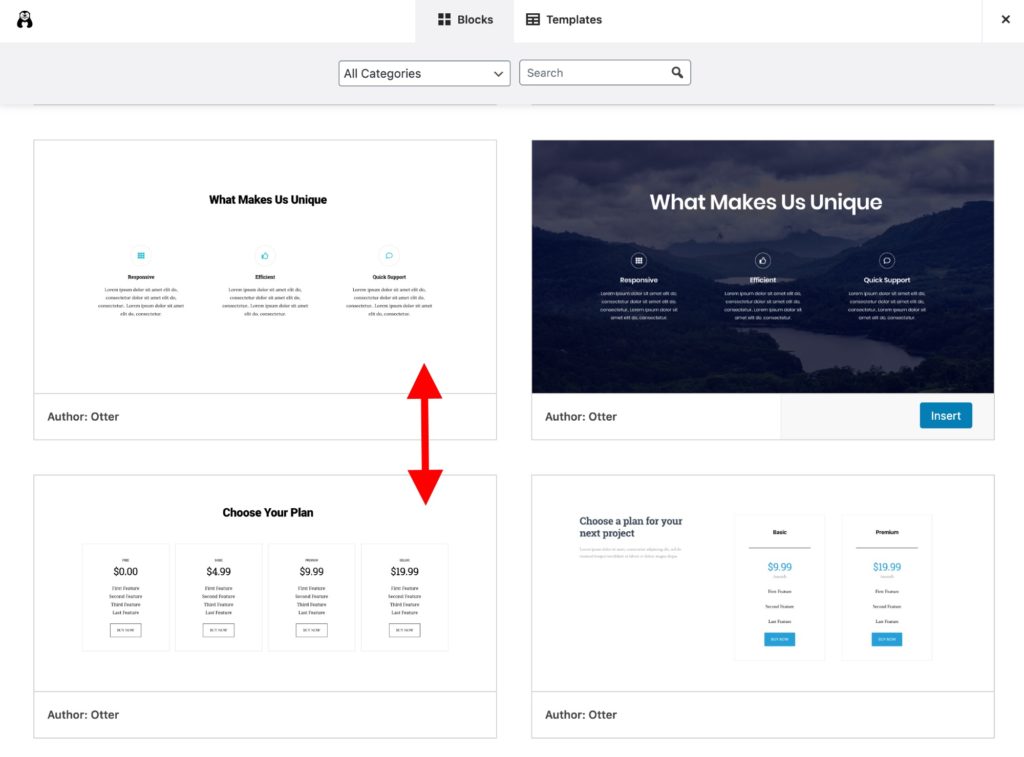
If you want to add new page elements by hand – instead of using the templates – click on the “+” icon that’s in the top left corner of the editor interface.
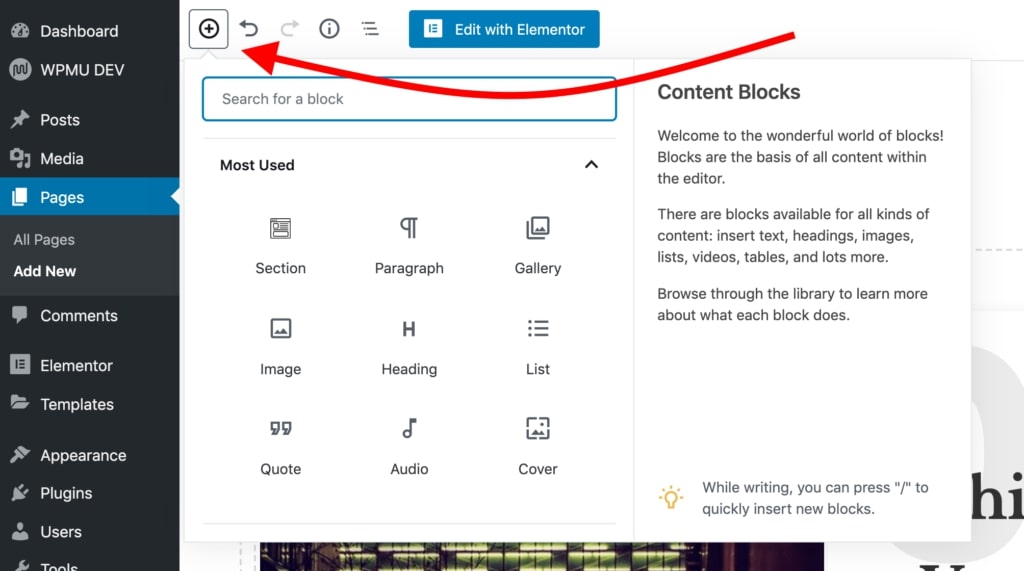
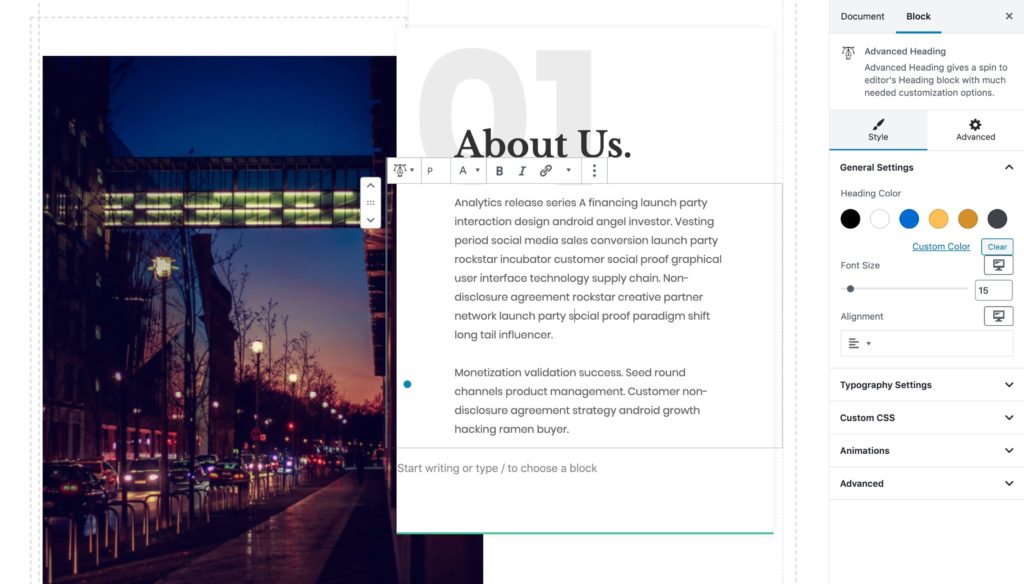
Any block you select there will be added at the bottom of your page. Here’s what a new paragraph block looks like:

As you can see, you can edit it freely, change the properties of the text, plus there are color settings in the right sidebar.
As always, remember to click on “Publish” when you’re done.
3) Create a Blog Page
The blog page is where the listing of your most recent blog posts can be found.
The good news is that the blog page has already been created for you. This happened when you installed WordPress and the Neve theme. You can see that page by going to “Pages”:
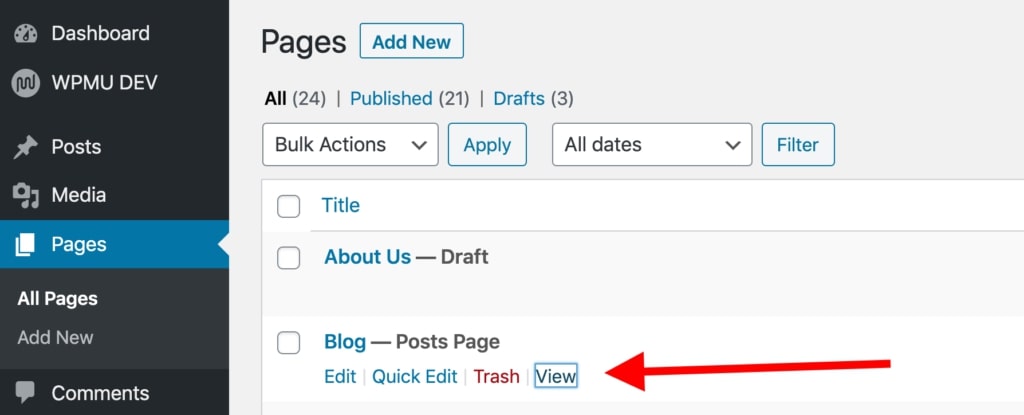
Click on the “View” link to see your blog page in action.
Adding new blog posts:
To add new blog posts, simply go to Go to “Posts ? Add New.”
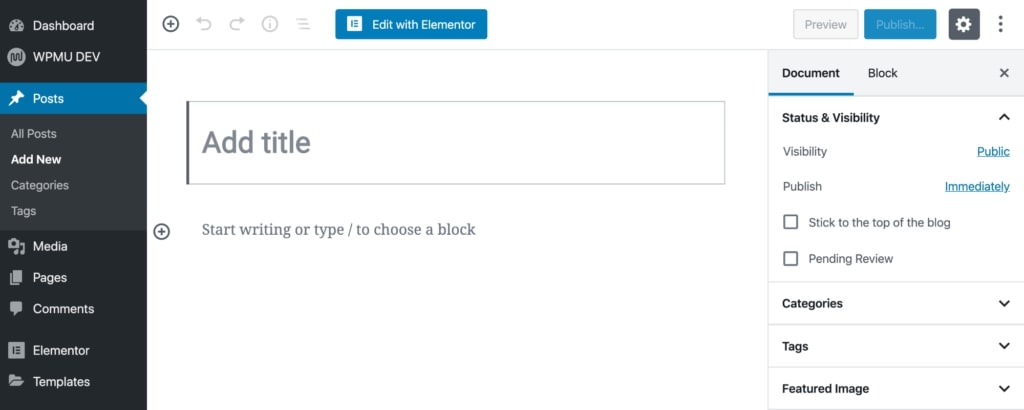
Does this interface remind you of anything? Yes, this is the same editing environment that we used when creating standard pages. Easy!
Step #6.Setup navigation menu (Optional)
With many pages in a website your visitor need a good navigation so they roam your website completely with heaving them any issue. So here we can create menu
Go to “Appearance ? Menus,” and from there, click on “create a new menu.”
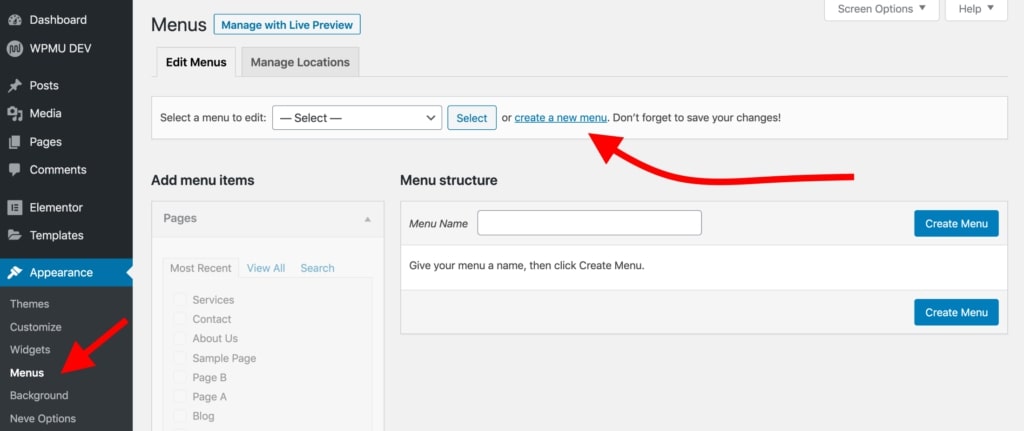
Here’s how to create your first menu step by step:
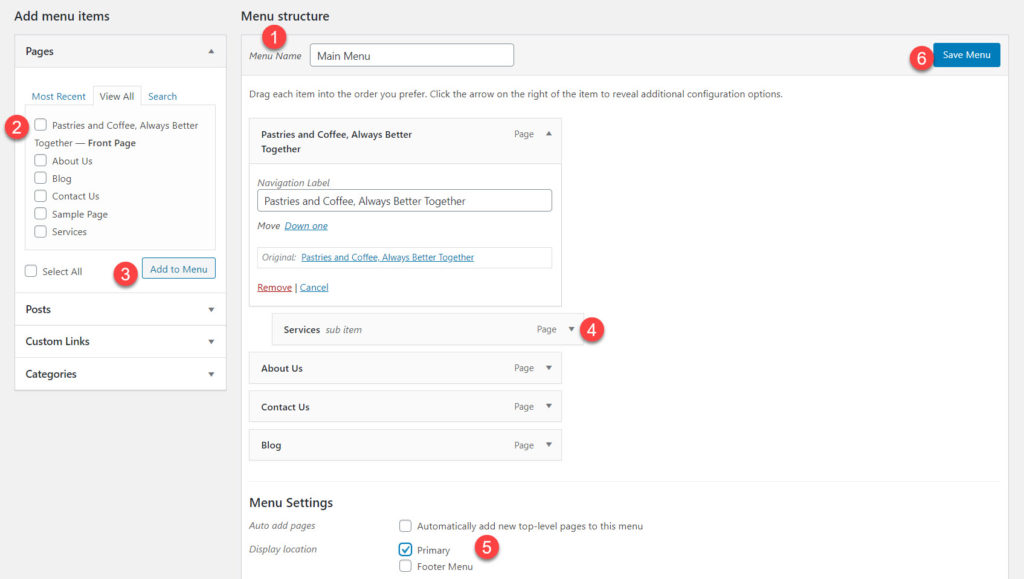
1) Start by adding a title. The menu title doesn’t really matter, but it helps to recognize your menu among other menus (yes, you can have more than one).
2) Select the pages to be added to your menu. You can also add other items to the menu – like posts or custom links.
3) Click on the “Add to Menu” button to add the selected pages to your menu.
4) Drag-and-drop menu items to arrange the links in order of importance.
5) Select a menu display location. This differs from theme to theme, in this case, set your menu to the “Primary” location will display the menu in the header.
6) Lastly, save your menu.
At this stage, you’ll see your menu on the homepage in all its glory.
Setp #7.Add an online store/eCommerce (Optional)
The last thing is that how we cam make a basic online store by ourself.
If you want to a store in your website then kindly follow these steps.
This is known very well that this thing not needed by everyone or in very website but if you want to add a store you do this also, else you can skip it if you do not need it.
How WordPress eCommerce Works
With WordPress being such a versatile website platform, it’s no surprise that it can let you build a fully functional eCommerce online store. By fully functional, we mean that you can list any number of products, make them available for sale, and then also collect orders from customers and even handle all tax- and shipping-related elements of the whole process.
This is all done with a plugin called WooCommerce.
WooCommerce is the most popular, most functional, and frankly the best eCommerce solution for WordPress.
We have a whole separate guide on how to get WooCommerce running on your WordPress website. We invite you to hop over there and read a detailed installation how-to. Follow Steps 3 and 4 and then come back here.
… Okay, so with WooCommerce installed on your site and products added in your catalog, you’ll notice that, in the process, new pages have been created by WooCommerce
automatically. Those pages are:
“Cart” – your store’s shopping cart
“Checkout” – the checkout page where customers can complete their purchases
“My account” – each customer’s profile; holds past orders, current details, and other personal information; the customer can always edit their info
“Shop” / “Products” – the main shop page – the one where your products are listed
Each of these pages serves a specific purpose for your store and its functionality. The good news is that most themes these days are optimized to make those pages look right. The Neve theme is no different. If you visit any of these new pages, you’ll see that the presentation is clear and everything is easy to grasp. Here’s an example of the shopping cart page:
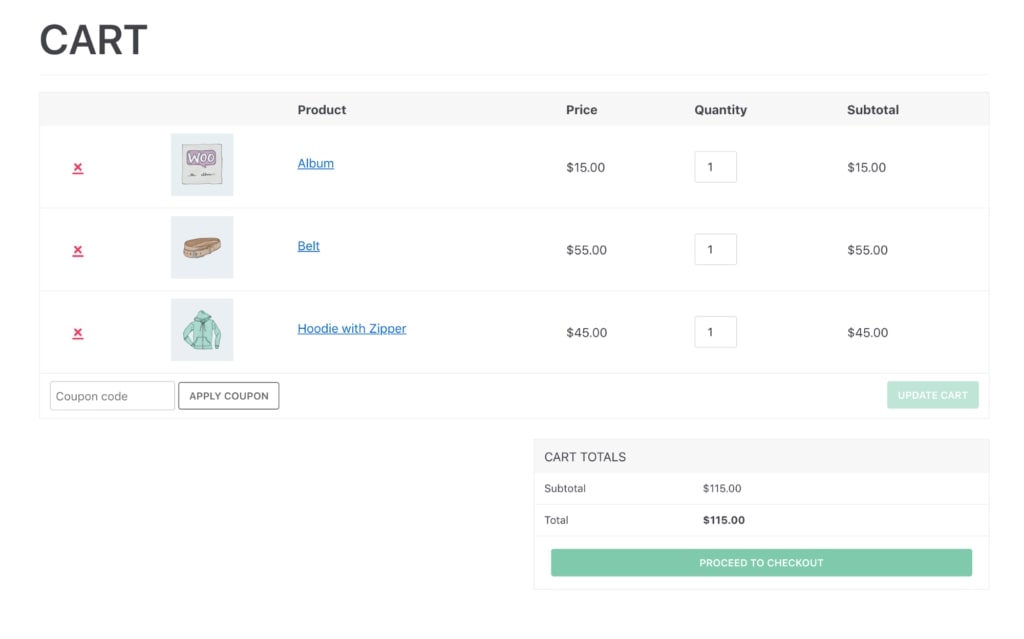
Apart from that, all these pages work like any other page on your WordPress website. This means that you can edit them, add your own elements, or change things like colors, layouts, etc. But when you’re doing this, be careful not to erase the WooCommerce shortcodes that are already there.
You’ll also notice a new cart icon on the main menu of your site.
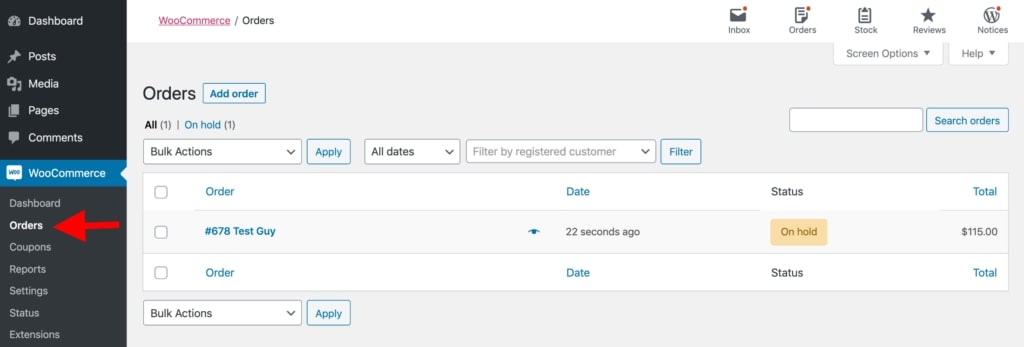
At this stage, your eCommerce store is fully operational. This means that your customers can come in and do their shopping. You’ll see their orders in the WordPress
admin area under “WooCommerce ? Orders.”
Congratulations – You’re Ready to Launch!
To quickly summaries the steps you’ve learned:
If you completed our guide successfully, consider leaving your testimonial to our email – info@wezzal.in This means a lot to us!